Using Sales Planning Autopilot
The Sales Planning Autopilot is an internal tool that allows you to create new planning cycles efficiently. The tool sits outside of the native Sales Planning application but provides you a step-by-step chronological workflow on steps to take to create a new planning cycle. In addition to allowing users to upload standard files, it also allows users to upload battle-card structures, territory group type structure and territory group structures that cannot be done within the Sales Planning application.
Warning
The Autopilot tool is available only to internal users and is not permitted for customers and partners.
Note
Autopilot is used for creating net new planning cycles only and not for modifying existing planning cycles.
Video walkthrough of Autopilot
Accessing Autopilot
You can access Autopilot using this URL.
Sample files
You can view sample files here for each part of the autopilot workflow to get an idea of how to format your files.
Setting up Autopilot
To set up Autopilot:
In the Sales Planning application, create a new planning cycle. Follow all the step outlined for creating planning cycles.
Open up a new browser and enter the URL of the environment that you would like to access.
On the Sales Planning Autopliot page, select a Region. The region is the environment (for example, development, staging etc.) that you would like to work in to set up your new planning cycle.
Enter a token. To get your token:
Go back to the Sales Planning application.
Open up your newly created planning cycle.
Right click and select Inspect element.
On the title bar of the inspect element page, click
 to open up the more options menu. Select Application.
On the left panel, navigate to the Storage section, expand the Local storage option, and ensure the URL is selected.
In the rightmost panel, under Value, click on the body element.
In the bottom panel, expand on the body element, find the access_token element, and right-click and copy the value.
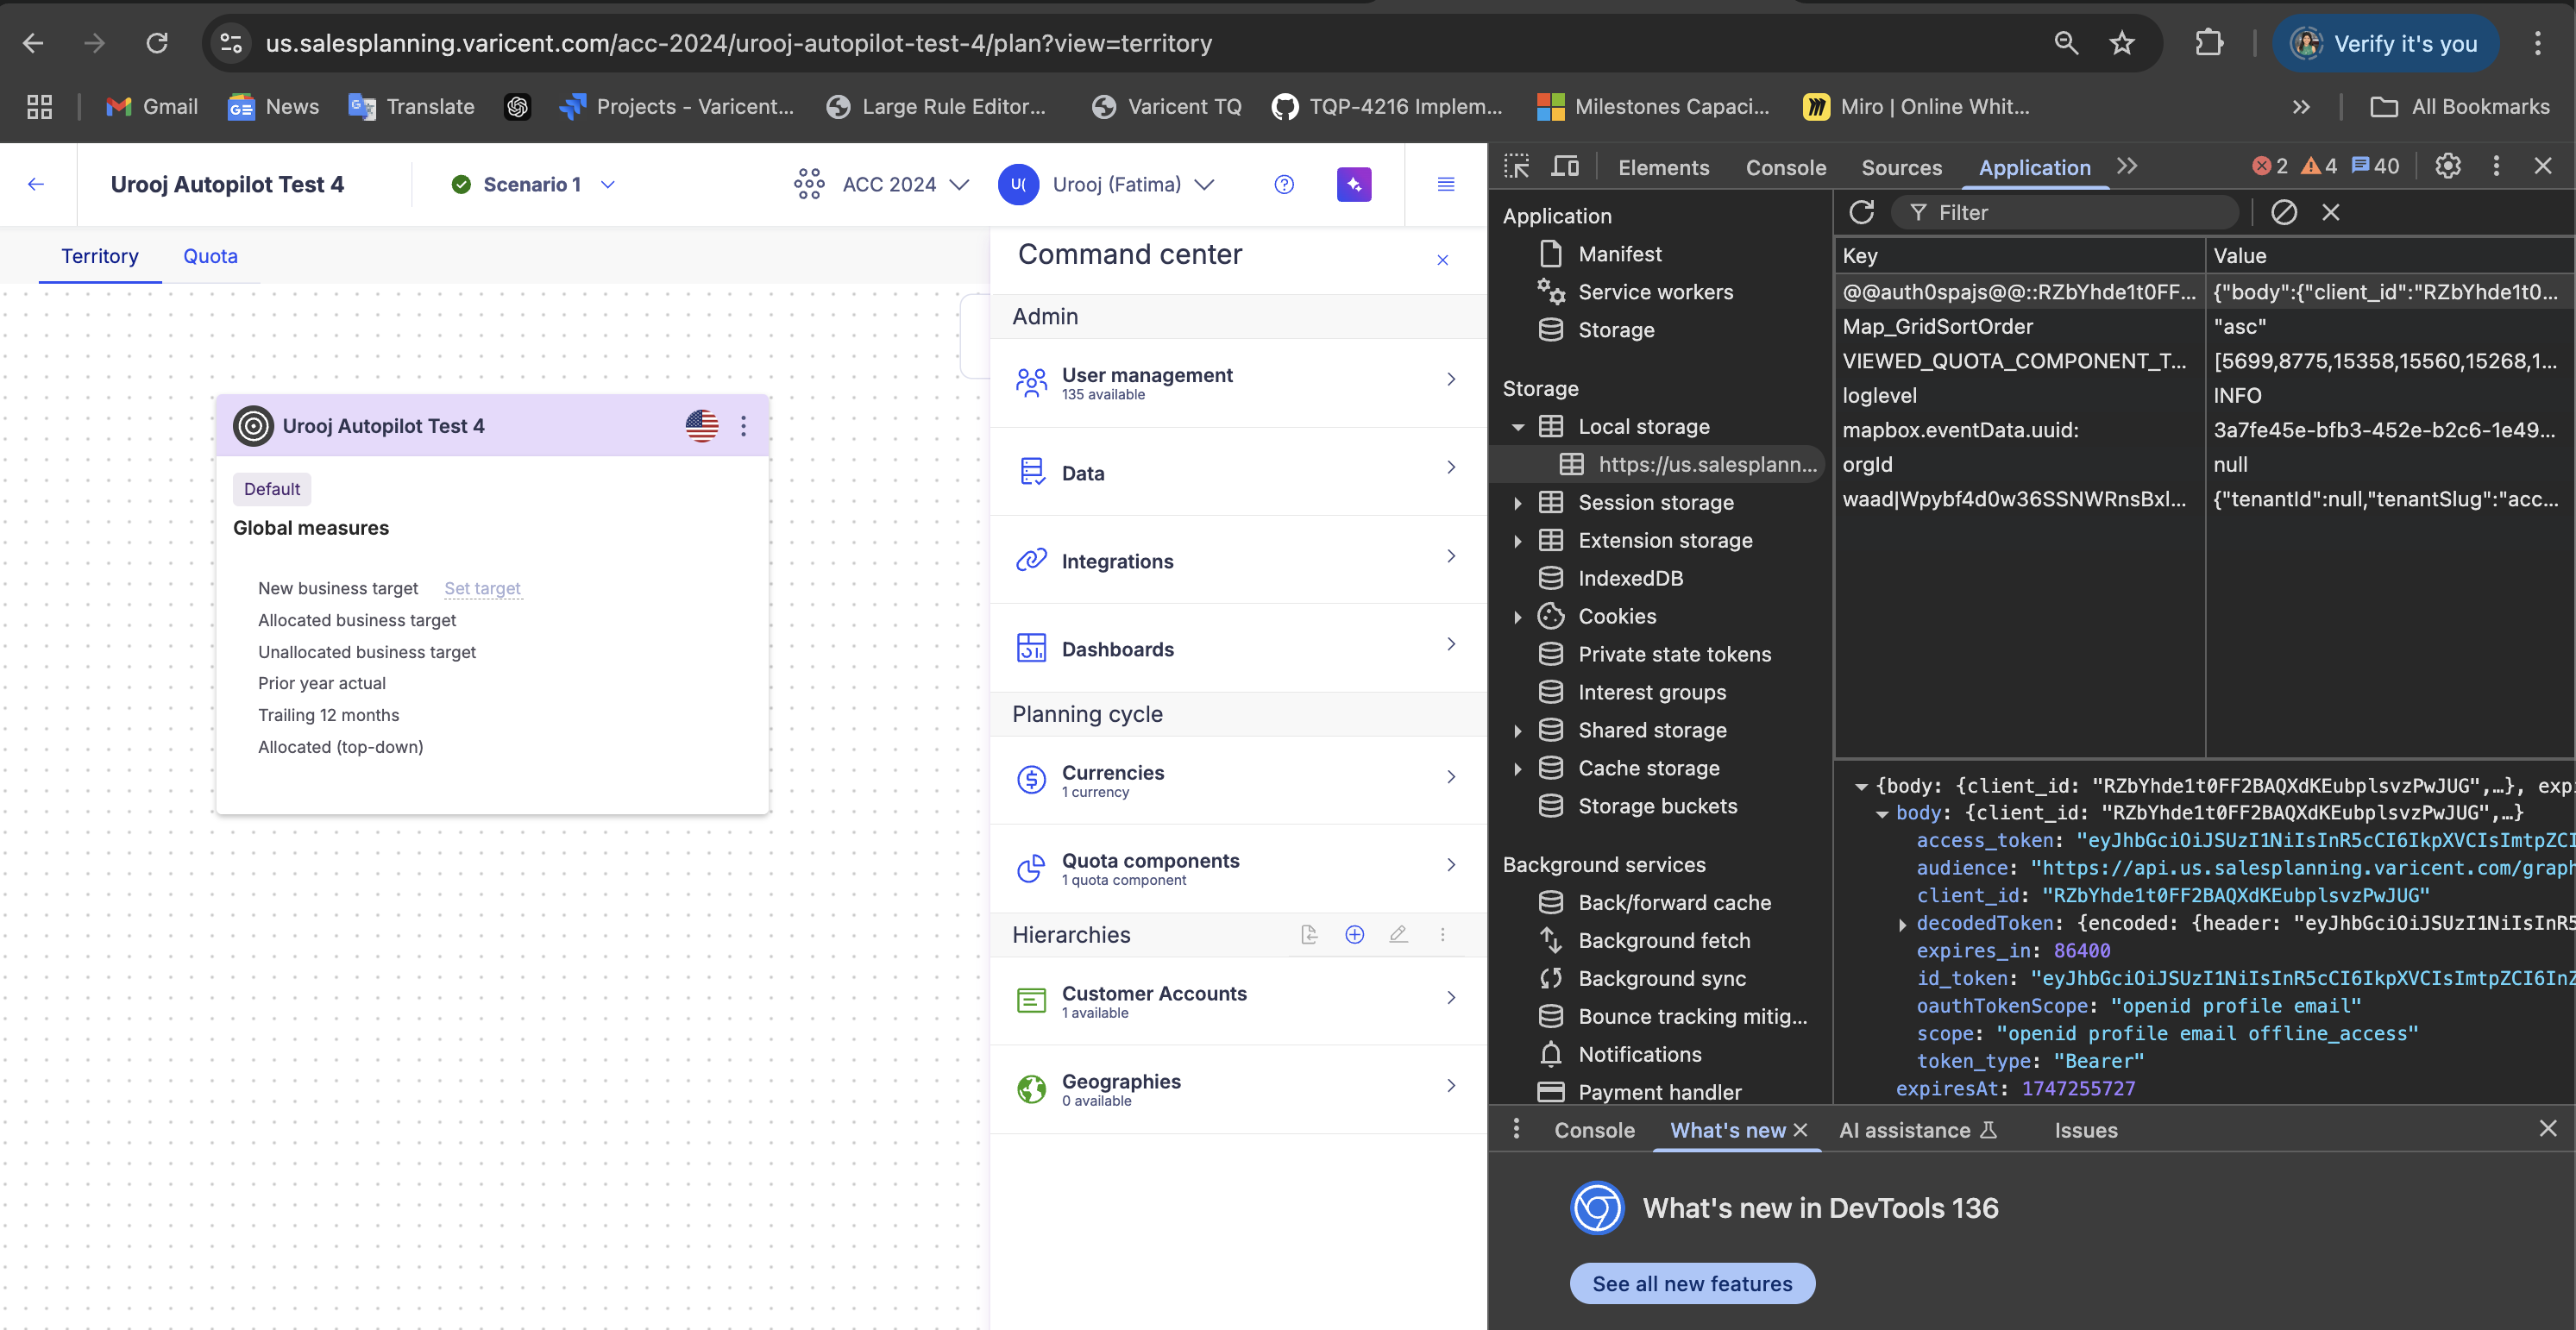
Return to the Sales Planning Autopilot page and paste this token in the Token section.
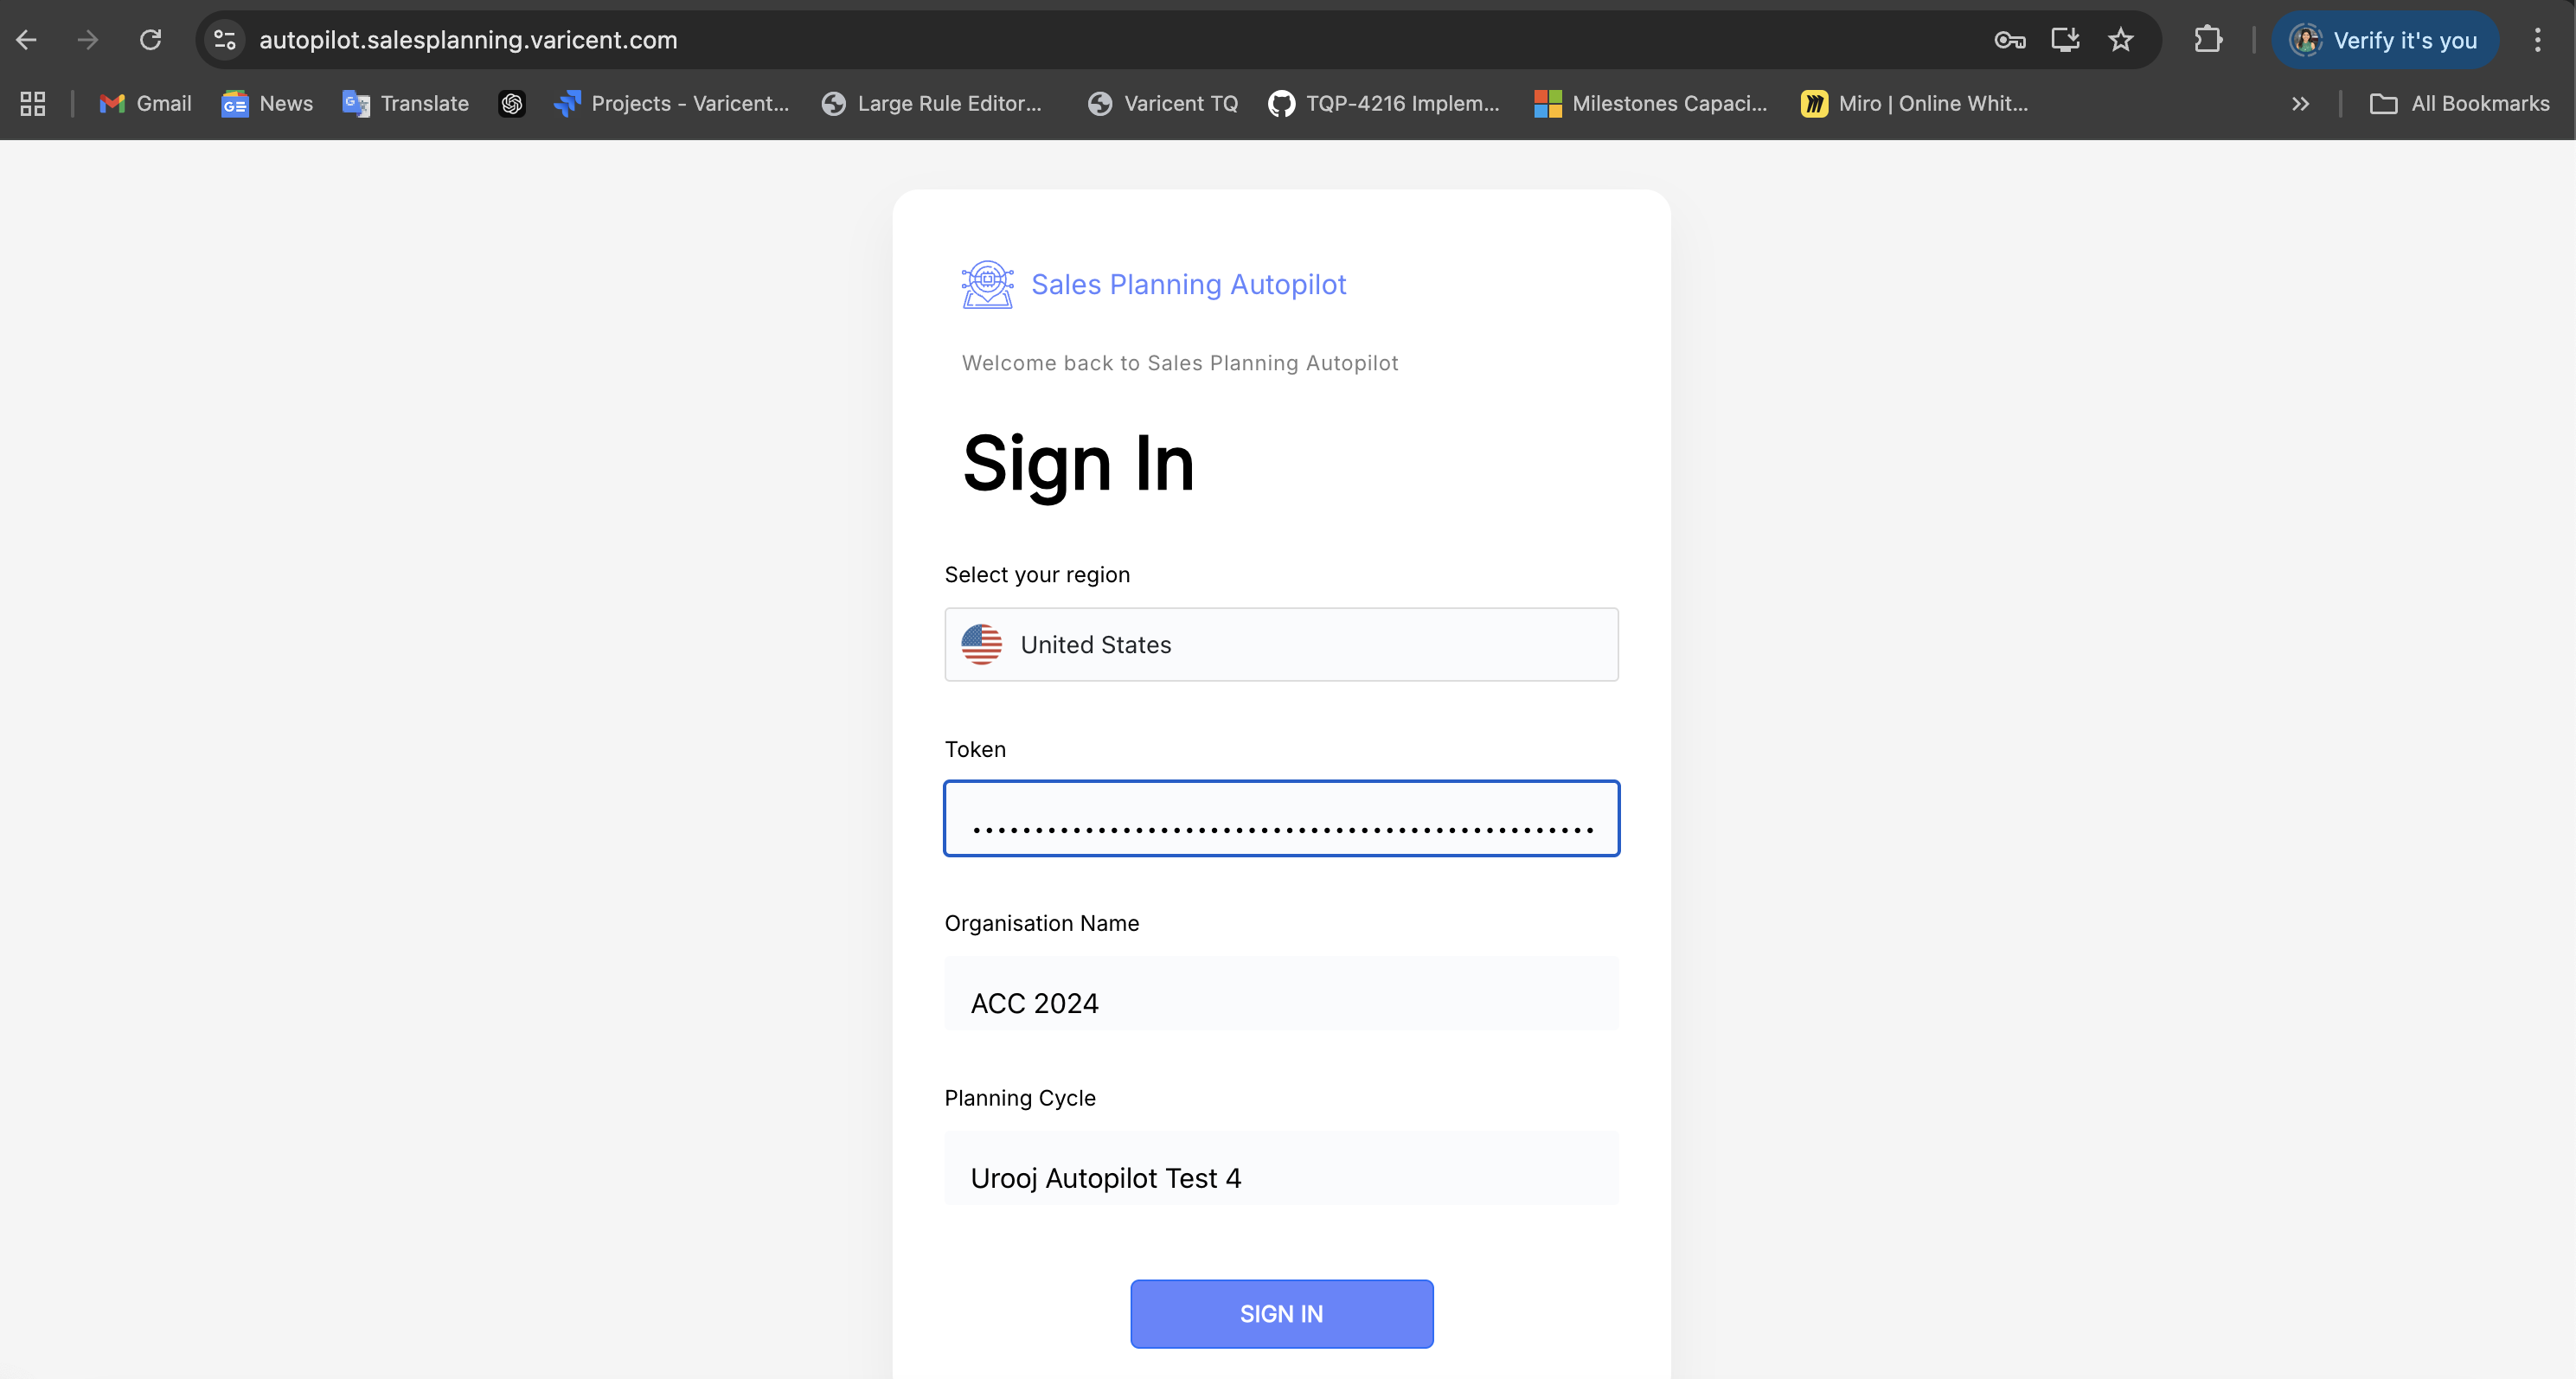
Enter your Organization name. This is the name of your tenant.
Note
The value you input for this field is not case sensitive.
Next, enter the name of the newly created planning cycle.
Click Sign in.
Creating planning cycle structures
The following table includes all the steps in chronological order that you need to complete to set up your new planning cycle.
Warning
You can only advance to the next level if there are no errors in the submitted file.
Step | Notes | Skip options |
|---|---|---|
Battlecard Structure |
| No |
Battlecard Territory Group Types | Precedence is the order of the territory group type that, similar to how it is set in the UI. 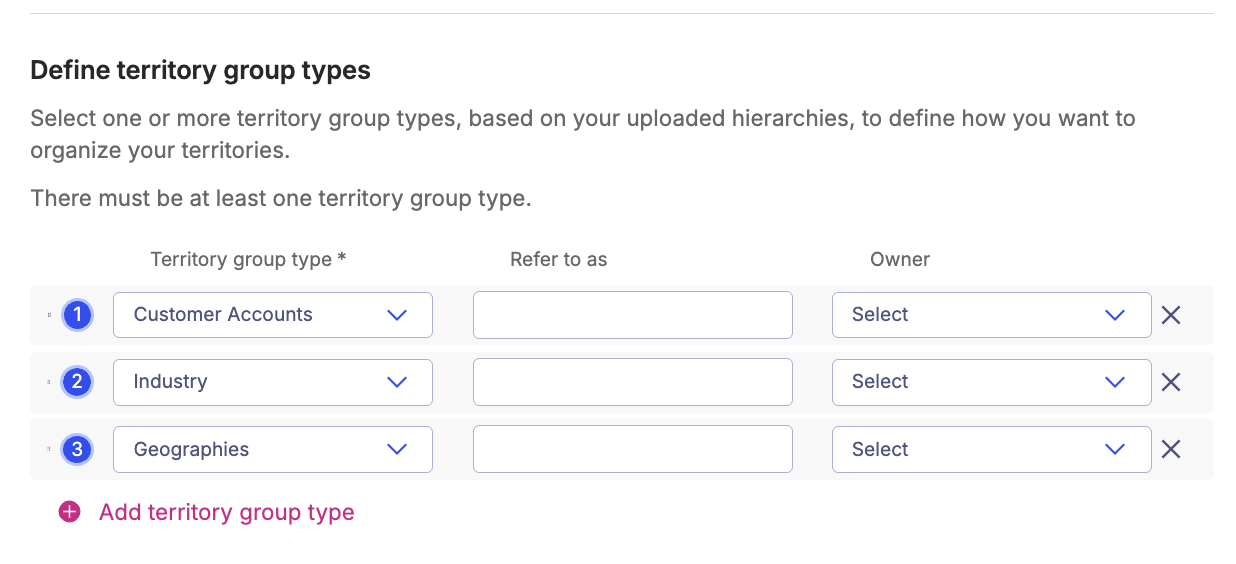 | No |
Quota Components | Default option will be removed if quota components are explicitly named. | Yes |
QC Assignments | Yes | |
Territory Groups | No | |
Customer Account Hierarchy | Any columns outside of the mandatory columns are not supported via import through Autopilot (ex. Effective dates, custom fields) | Yes |
Geo Hierarchy | See Geography Hierarchy catalog in drive to know how to set this up or skip and go directly go through the Sales Planning application.
| Yes |
Custom Hierarchy (e.g. Product) | Yes | |
Territory Rules | No | |
Seller Assignments | Yes | |
Quota Sheets | Yes | |
QS Columns |
| Yes |
QS to BC Map | Yes | |
QS to QC Map | Yes | |
Activity Files | No | |
Pins | Yes |
Launching and resetting autopilot
Once you upload documents into the table, you can launch the script. If the script fails to run successfully, you'll need to re-upload your files and launch the script again.